 Think your book cover design isn’t important? Think again. Book covers sell books. Whether you are a self-published author, or a traditionally published author, your book’s cover is the first thing your prospective readers will see. Here’s how to make your own book cover design whether you are using it to share with family and friend, sell it on Amazon and in bookstores, or offer it as an e-book.
This article will show you how to:
- How to Make Your Own Book Cover Design for Personal Use
- How to Make Your Own Book Cover Design for Publication
- How to Make Your Own Book Cover Design for e-Books
How Buyers Make Book Buying Decisions
Step One: The buyer sees the front cover of your book, likes the color, image, and title. The buyer goes to Step Two.
Step Two: The buyer clicks on your book to read the book summary or picks it up a bookstore and flips it over to read the Back Cover Copy. The buyer likes the summary or back copy and moves to Step Three.
Step Three: The buyer opens the book to look inside, reads the first page of Chapter One, likes it, and moves to Step Four.
Step Four: The buyer purchases your book; or, the buyer doesn’t like it, puts the book down, and chooses another title.
When you make your own book cover design, it’s important to remember, though, that many book buyers skip Step Three if they like Step 1 and Step 2. I’ve purchased many books this way. In fact, I’ve even purchased books simply because they had a Great Book Title.
“What if my book cover isn’t facing out?” Great question. This is why a Great Book Title is so important. Most bookstores can only afford to put a few books on the shelf with the front cover facing out. This leaves the majority of books with only about an inch or less of advertising space. In this case, insert Step One-A: The buyer sees your Great Book Title, picks up the book, and turns to the front cover, continuing to Step One.
 Learning how to make your own book cover design can save you money as a self-publishing author. For many authors, it can make the difference between seeing the book printed and bound, and available for reading, or simply remain a document on their computer.
It’s not as difficult to make your own book cover as it once was. Today, you can find software and templates that will help you create an attractive and professional-looking book cover. If you have basic computer skills and can follow instructions for using software like Microsoft Word, Adobe Photoshop or InDesign You can make your own book covers. You can also use free software like Paint.net and Gimp, to can make your own book cover design.
For years, I’ve been making book cover designs for self-published authors. I started out in self-publishing in the late 90s using WordPerfect and CorelDRAW, when they were still popular. For the self-publishing author with some design skills and a little patience, you can create attractive book covers that sell.
Before sitting down to your computer to make your own book cover design, it’s important to consider some very important factors. First of all, how will you be publishing your book and what is the market? Some authors just want an attractive cover so they can print the book and share it with friends and family. Other authors have a tight budget and have the goal of publishing their book on Amazon in print form or as an e-book.
If you are either type of author, making your own book cover design can save you money and provide an additional creative outlet for your book project.
Make Your Own Book Cover Design for Personal Use
Learning how to make your own book cover design for personal use is very easy and requires less consideration than for public publication. For this process, you may want to simply use Microsoft Word or a program like Paint.net.
If you are going to have your book printed in a size smaller than 8.5” x 11”, you’ll want to make sure to consider whether your cover will have a solid color that runs to the edge of the book or “bleeds”. Getting a bleed on your cover is achieved by printing your cover on paper larger than the final book and then trimming the bound book to size.
If the background color of the book will be white, it will be easier to produce without trying to set up bleeds. Just remember to keep about a .25” to .5” margin around your book images and title. This will ensure that they don’t get trimmed off during the binding.
If you want to create a full-color cover with a solid color or a complete image making up the book cover, you can easily create a bleed in your Microsoft Word cover document.
Here’s how to create a bleed in a Microsoft Word Document:
Step One: Go to Page Setup. You may find this under the Page Layout Menu, depending on your version of Word. Click on the Paper tab and add a quarter of an inch, .25” to the width and a quarter of an inch, .25, to the height.
Step Two: Go to the Margins tab or menu in Page Setup and add .125” to each of your margins. Adding this additional 1/8” inch will make sure your text and design stay where you want it to be.
Step Three: Adjust Cover Artwork. Once your page settings have been changed, adjust your cover artwork, images, or background color to the new page size.
You now have your bleed. When your book is bound and trimmed, the art will go all the way to the edge of the book.
When designing your cover, it’s important to keep in mind how many pages the book will have. This determines the size of the spine. Check with your printer. They can give you the thickness of the book based on the type of paper the book will be printed on.
Many publishers offer free book cover templates for Microsoft Word. Beginning with a template can save you a lot of time and frustration when you want to make your own book cover design.
Make Your Own Book Cover Design for Publication
Making your own book cover design for publication is a bit more involved and will require more time for your first few attempts as you learn to use your chosen software. The first covers I designed back in the 90s were created in WordPerfect using simple clip art. These designs were nothing to write home about, but they served the purpose of getting the books designed, printed, and available for sale to the authors market.
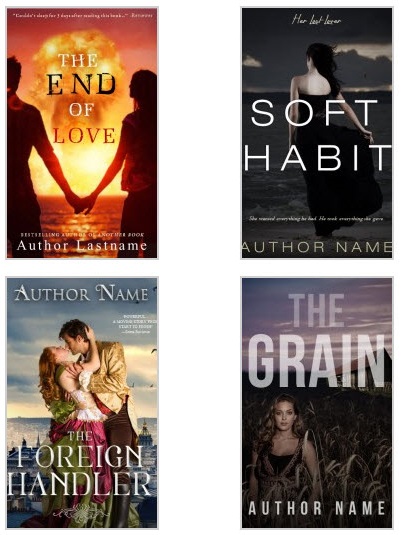
 Step One: Research. Before even beginning to make your own book cover design, you need to do some research. Whether you go to Amazon.com or your local book store, take some time to get a feel for book design and what you like. In my early days as a cover designer, I used to steal cover design concepts, and I still keep an eye on what designs are used for top-selling books.
Why reinvent the wheel when you can learn from top paid designers. Never, I mean never, try to make a book cover design without collecting samples of books you like. This step alone will save you countless hours of frustration and multiple redesigns.
Step Two: General Layout. Once you find 3-4 book designs that you like, make your own simple mockups using your title, images, and colors. Don’t worry about spending time finalizing your image or title font, just get the size, shapes, and colors laid out. Print out several different versions and ask your family and friends to pick their favorite.
If you do have plenty of time and are really enjoying the process, you may want to make several “final” versions with the exact image, fonts, and color, etc. A picture is worth a thousand words and seeing your book cover in full color will be both motivating and inspiring.
Step Three: Finalize the Cover. If you used a program like Microsoft Word or Paint.net to do your initial mockup, it’s now time to move to the final software you will be using. It is possible to use Word or Paint.net for your final cover, but they are limited in the design options you will have.
I recommend using a professional program like Adobe Photoshop or InDesign. One thing to keep in mind when choosing your design program is the final output of the design. When you use Adobe Photoshop, the entire output is an image. This can create a rather large file, even when saving it as a jpeg or PDF. For this reason, I have come to appreciate Adobe InDesign for its flexibility and smaller file output options.
Using professional-grade software can be daunting at first. But don’t let that put you off. If you like the creative aspect of making your own book cover designs, like saving money, have the extra time after your writing, then I think you’ll find this software the better choice for design in the long run, especially if you plan to self-publish multiple titles.
 Many designers and publishers offer free book cover templates for InDesign. Beginning with a template can save you a lot of time and frustration. If you want to see some covers I’ve created using InDesign, visit my portfolio. The newer book designs were all created using InDesign.
Make Your Own Book Cover Design for e-Books
Making your own book cover design for an e-book requires some special consideration. If you are starting with an e-book, but plan on eventually going to print, make sure your initial design is optimized for viewing on e-book readers.
Take a look at the books available on your Kindle or Nook. You will see first of all that the covers are all very small or thumbnail size. This is very important because, like a print book sitting on a shelf in a book store, e-book covers sell e-books. In designing book covers for e-books sold on Kindle, Nook, or other devices, size matters. If you’re selling a download PDF version of your e-book, this is not as critical.
Because many of your readers will be making their purchasing decision right from their e-book reader, it’s very important that your final book cover design looks good as a thumbnail. Not only in color, but also as a black and white thumbnail.
On my Kindle, I make purchasing decisions based, in part, on an image that is less than .5” x .75”. Now, this is not the size of the image that you will have to create or upload to Kindle. Amazon automatically resizes your cover image. But if you want to see how your thumbnail size cover will look to your buyers, resize a color and black and white image of your front cover down to this size. Even on my Kindle, when I buy, the first thing I look at is the cover.
Step One: Research. Whether you’re making an e-book only cover, or a cover for print, still do your research. I always get great ideas for my designs by looking at what has already been created. It also helps me keep in mind what not to do, such as use fancy script fonts for the Great Book Title I create.
Step Two: Create a Mockup or Design. With an e-book only cover, all you have to do is create the front cover design. This simplifies the design work you have to do. However, if you think you’ll be using the same cover for a print version, take the extra time and create the full front and back cover of your design.
To convert the full cover to your e-book cover you’ll only need to convert it to an image, jpeg, and crop it to the front cover image. Now, when you’re ready to go to print the book, you’ll have a lot of the work already completed.
Step Three: Make sure your design looks good in the various recommended sizes for Kindle, Nook, and other e-book publishers. Once you’ve saved your cover as a jpeg, you can easily resize it to see how it looks.
Software to Make Your Own Book Cover Design
Choosing the right software for making your own book cover design depends on several factors.
Factor One: Your budget. As an author, you probably already have a copy of Microsft Word. This is the most affordable way to go, and probably the easiest.
For a bigger budget, I recommended Adobe InDesign or Photoshop. Getting access to these programs is not as expensive as it once was. With the new Adobe Creative Cloud, you can have access to Adobe’s Creative Suite programs for only $49.99 per month for an annual membership plan. If you only want one program, like InDesign, you can get access for only $19.99 per month.
Factor Two: Ease of use. Adobe programs and even free programs like Gimp, require more time for becoming familiar with the menus and other options. However, there are many YouTube videos that will show you how to do virtually anything with these programs, saving you a lot of time and frustration trying to figure it out on your own.
Take my advice. If you don’t know how to do it, just Google it.
Now that you’ve got a basic understanding of what’s involved in making your own book cover design, it’s time to decide if you’ll do it yourself, or higher a professional designer to create the cover for you.
Even if you do higher a graphic designer or freelance book cover designer to make a book cover design for your self-published book, it’s valuable to understand the process so you can clearly communicate what you want in a cover.
As a self-published author, you have the final say over your book’s cover, unlike traditionally published books. Take the time to get an idea about what you think looks good. If you’re like most authors, you buy a lot of books and you know what you like. You can make your own book cover design if you’re willing to put the time in to learn how.